顯示具有 python 標籤的文章。 顯示所有文章

2025年4月5日 星期六

Python and Streamlit - Sale Dashboard

RWEPA | Python + Streamlit - 銷售儀表板

🌸YouTube  (包括中文字幕)https://youtu.be/QmvlYHspvns

🌸【謝謝訂閱、按讚、分享與開啟小鈴鐺💡】


銷售儀表板 App 執行畫面:


Outline:

1.App構思 (App Idea)
2.App示範 (App Demo)
3.程式碼解說(Coding: VSCode + Python + Streamlit)
4.佈署與結論 (Deployment and Conclusion)

🌸Streamlit App 示範:
🌸Streamlit 程式碼下載:
# open data
# sales
# python
# streamlit
# plotly

2025年3月3日 星期一

Python - AQI Application

RWEPA | Python AQI 空氣品質指標資料分析

🌸YouTube  (包括中文字幕)https://youtu.be/0UJbhVWDuI4

🌸【謝謝訂閱、按讚、分享與開啟小鈴鐺💡】

AQI Application 執行畫面:


Outline:

1.商業理解
2.資料理解
    2.1 模組與資料匯入
    2.2 資料摘要
    2.3 探索性資料分析(Exploratory Data Analysis, EDA)
    2.4 資料視覺化
3.資料準備
4.建立模型
5.模型評估與測試
6.佈署應用與結論
參考文獻


🌸進階參考文章:
# open data
# aqi
# python
# sklearn
# kmeans clustering
# folium
# streamlit

2024年11月14日 星期四

Python Jupyter-notebook for blank page(Solved)

RWEPA | Jupyter-notebook 開啟空白網頁(已經解決)

近期安裝最新版 Anaconda [Anaconda3-2024.10-1-Windows-x86_64.exe], 啟動 Jupyter-notebook 會有以下情形, 測試環境為 Windows 11-23H2 家用版 64位元 + Google Chrome:

問題1: 

'jupyter-notebook' 不是內部或外部命令、可執行的程式或批次檔。


解決方式:

程式集 \ 右鍵 \ 系統 \ 進階系統設定 \ 環境變數 \ 系統變數 \ Path \ 編輯 \ 新增

C:\Users\使用者名稱\anaconda3\Scripts


輸入完成後即可啟動 jupyter-notebook.

問題2:

Jupyter-notebook 可以啟動, 但結果為開啟空白網頁.

解決方式:

Google Chrome \ 設定 \ 啟始畫面 \ 選取 開啟新分頁, 設定完成即可正常啟動.


問題3:

如何使用命令提示字元開啟 Jupyter-notebook, 且預設啟始目錄為 D 磁碟.

解決方式:

在桌面新增 jupyter.bat, 使用記事本編輯此檔案, 輸入二行指令並儲存檔案
d:
jupyter-notebook


直接選取 jupyter.bat, 按 Enter 即可以於D 磁碟使用 Jupyter-notebook.

問題4:

如何使用 命令提示字元或 Anaconda Prompt 開啟 Jupyter-lab, 且預設啟始目錄為 D 磁碟.

解決方式:

直接輸入以下指令, 即可以開啟 D 磁碟工作目錄

jupyter lab --notebook-dir=D:/

#python
#jupyter-notebook
#jupyterlab
#chrome

2024年7月11日 星期四

Stable Diffusion Model


RWEPA | Stable Diffusion Model 本地端安裝-AI生成式繪圖


# 感謝 Janet 提供問題.

🌸YouTube  (包括中文字幕)https://youtu.be/bSMa5SGJrRk

🌸【謝謝訂閱、按讚、分享與開啟小鈴鐺💡】

Outline:
1.Stable Diffusion 簡介
2.SD 安裝與參數設定
3.SD 使用
4.SD 中文化
5.Google Colab
6.結論

🌸投影片 stable_diffusion_model.pdf

https://github.com/rwepa/DataDemo/blob/master/stable_diffusion_model.pdf

🌸AUTOMATIC 1111 github

https://github.com/AUTOMATIC1111/stable-diffusion-webui

🌸安裝 Fooocus for Windows

https://github.com/lllyasviel/Fooocus/releases/download/release/Fooocus_win64_2-1-831.7z

🌸如果沒有 NVIDIA顯示卡, 則使用Fooocus時,  在 run.bat 檔案須加上 --always-cpu, 完整2行程式碼:

.\python_embeded\python.exe -s Fooocus\entry_with_update.py --always-cpu
pause

🌸Google Colab - Fooocus線上版

#python
#stable difussion
#automatic1111
#clip
#u-net
#vae

# 2024.11.16 updated

🌸 AnyLoRA - Checkpoint

近日下載並安裝 AnyLoRA - Checkpoint, 記錄執行結果.

執行環境:
OS: Windows 11 Home
CPU: Intel Core Ultra 7
RAM: 32GB
VGA: NVIDIA RTX4060-8GB

1. 下載 AUTOMATIC 1111 - sd.webui.zip


2. 安裝中文介面

步驟2.1: sd-webui \ Extensions \ Install from URL \ https://github.com/bluelovers/stable-diffusion-webui-localization-zh_Hant.git \ Install \ Reload UI

步驟2.2: sd-webui \ Settings \ User interface \ 下拉式選單 zh_Hant \ Apply setting \ Reload UI

3. 下載 sd-webui-prompt-all-in-one

git安裝網址: https://github.com/Physton/sd-webui-prompt-all-in-one.git

4. 下載 anyloraCheckpoint 模型
  • 安裝: 將 anyloraCheckpoint_bakedvaeBlessedFp16.safetensors (3.21GB) 複製到 \sd.webui\webui\models\Stable-diffusion 目錄
  • 在 webui 網頁中切換至 "anyloraCheckpoint_bakedvaeBlessedFp16.safetensors" 模型
  • 提示字: 1girl,smile,city
  • 按 [產生 Generate] 按鈕
5. 繪圖結果(5秒生成 512x512 png圖檔)


# end

2023年11月14日 星期二

Python - Anaconda packages list

RWEPA | Python 安裝 Anaconda 軟體之後, 如何理解已安裝模組清單?


分析:

  1. 依據 2023.10.15 Windows版本 [Anaconda3-2023.09-0-Windows-x86_64.exe] 
  2. 預設安裝套件清單位置 C:\Users\UserName\anaconda3
  3. 預設安裝 489 packages
  4. 包括以下模組:
  • beautifulsoup4
  • boken
  • dask
  • datasets
  • flask
  • matplotlib
  • numpy
  • openpyxl
  • pandas
  • plotly
  • requests
  • scikit-learn
  • scipy
  • seaborn
  • sqlalchemy
  • sqlite
  • statsmodels

輸出套件清單:

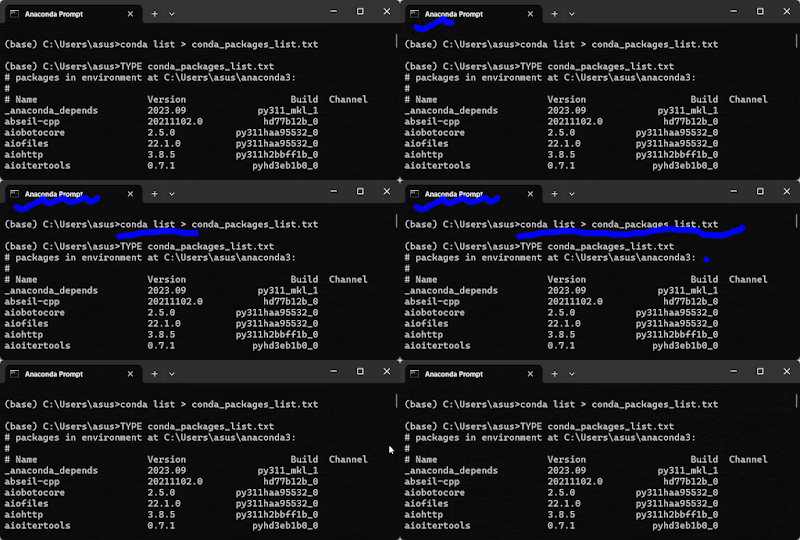
在 Anaconda Prompt 視窗中輸入以下指令, 即可輸出套件清單, 使用 TYPE 可顯示內容.

conda list > conda_packages_list.txt

TYPE conda_packages_list.txt


489套件清單:

https://github.com/rwepa/DataDemo/blob/master/conda_packages_list.txt

# end

2023年8月28日 星期一

Visualization Climbing Routes with Python and Streamlit

RWEPA | 登山路線視覺化分析平台 
(Python + Streamlit) 【中文字幕】


2023.11.11 更新

streamlit 佈署


步驟1: 連線

選取適當的登入選項, 本例選取 "Continue with GitHub"


步驟2: 登入 Streamlit

使用 GitHub 登入


步驟3:  建立新的app

選取 New app \ Create new app with Github Codespaces


步驟4: 佈署app

參考附圖依序輸出 "GitHub URL", "App URL", 最後按下 [Deploy!] 即完成 Streamlit 佈署.

# end

說明


使用免費 Python 與 Streamlit 模組,建立登山路線視覺化分析平台。

包括以下特色:

  1. 理解使用 Python程式匯入 GPX 檔案。
  2. 熟悉 Pandas 資料處理、matplotlib 與 folium 視覺化應用。
  3. 理解 Streamlit 模組檔案匯出為 Excel 應用。

🌸YouTube (包括中文字幕)https://youtu.be/-_zghs2qrIg

謝謝各位訂閱、按讚、分享與開啟小鈴鐺💡】

大綱


  1. 系統展示
  2. 程式解說
  3. 結論

模組


  1. gpxpy - GPX 檔案處理
  2. streamlit - 互動式資料分析
  3. folium - 地圖視覺化
  4. streamlit-folium - Streamlit + 地圖視覺化
  5. xlsxwriter - 寫入 Excel 檔案

程式碼下載


參考資源


#python
#streamlit
#gpx
#spatialization
#visualization

2023年1月11日 星期三

Python - streamlit dashboard

在 Python 環境中, Streamlit 模組提供資料分析的網頁服務框架,內建常用的網頁操作控制項,配合 pnadas 資料分析模組,matplotlib 等視覺化模組,可以快速建立互動式網頁服務與企業級儀表板,其功能與 R 語言的 shiny 套件相似。


YouTube: https://youtu.be/FW-dl-flLvk

【記得按 讚、訂閱、開啟小鈴鐺】


Community Cloud(包括免費版本): https://streamlit.io/cloud

模組: Python - streamlit

LINK: https://rwepa.blogspot.com/2023/01/python-streamlit-dashboard.html

Code: https://github.com/rwepa/teaching-streamlit

# end

2022年10月22日 星期六

shiny for Python (Python 使用 shiny 模組教學)

Python 程式使用 shiny 模組執行結果:


R語言的 shiny 套件可以建立跨平台的互動式網頁,今年(2022)RStudio 研討會宣佈 shiny for Python, 表示在 Python 環境亦可執行 shiny 建立互動式網頁。

PyPI shiny: https://pypi.org/project/shiny/


Youtube 說明:


https://youtu.be/s2fgEAa6lq0

【謝謝各位大大幫忙按 訂閱、開啟小鈴鐺


PDF講義大綱:

  1. RWEPA 簡介
  2. 資料分析架構 --> APC方法
  3. 資料分析與視覺化應用
  4. shiny 簡介
  5. shiny for Python 實作篇1 - my_app
  6. shiny for Python 實作篇2 – 01_hello
  7. 結論

https://github.com/rwepa/shiny_python/blob/main/shiny_python_tutorial.pdf


Python 程式:

https://github.com/rwepa/shiny_python/blob/main/pyshiny_01_hello.py


檔案架構:

  • shiny 一般以資料夾方式儲存, 本例為 pyshiny_01_hello 資料夾
  • Python 主程式: pyshiny_01_hello.py, 程式名稱不一定是 app.py
  • Python 主程式路徑: D:\shinydemo\pyshiny_01_hello\pyshiny_01_hello.py


執行方式:

Windows 開啟命令提示字元,輸入以下內容:

  • d:
  • cd shinydemo
  • shiny run --reload pyshiny_01_hello/pyshiny_01_hello.py
  • 瀏覽器輸入 http://localhost:8000/


參考資料:

  1. RWEPA: http://rwepa.blogspot.com/
  2. RWEPA shiny: http://rwepa.blogspot.com/search?q=shiny
  3. Shiny for R: https://shiny.rstudio.com/
  4. Shiny for Python: https://shiny.rstudio.com/py/
  5. shiny for Python 實作篇2 – 01_hello 程式碼: https://github.com/rwepa/shiny_python

# end

2022年8月28日 星期日

Python 連接 Microsoft SQL Server

Python 連接 Microsoft SQL Server (Windows 10)

感謝 Jian-Guo 提供問題.


系統:

Windows 10, Microsoft SQL Server 2019 Developer Edition, Python 3.9.12

目標:

在 Windows 系統中, 希望使用 Python - sqlalchemy 模組, 連結 Micorosft SQL Server.

方法:

步驟1: 下載 Microsoft SQL Server

首先至 Microsoft SQL Server 的網頁下載並安裝 SQL Server [https://www.microsoft.com/en-us/sql-server/sql-server-downloads], 參考下圖下載 SQL Server 2019 Developer.


參考下圖 SQL Server 安裝執行畫面.


如果想使用 R 連接 Microsoft SQL Server, 請參考 [http://rwepa.blogspot.com/2013/08/rodbc-sql-server.html].

步驟2: 下載並安裝 sqlalchemy 模組

方法1: conda install -c anaconda sqlalchemy
方法2: pip install sqlalchemy

步驟3: 使用 sqlalchemy 模組連結 Microsoft SQL Server

# sqlalchemy_sql.py
import sqlalchemy
print(sqlalchemy.__version__) # 1.4.32

from sqlalchemy import create_engine
import pandas as pd

Server = 'localhost'
Database = 'Northwind'
Driver = 'ODBC Driver 17 for SQL Server'
Database_Con = f'mssql://@{Server}/{Database}?driver={Driver}'

engine = create_engine(Database_Con)
con = engine.connect()
con

df = pd.read_sql_query('SELECT * FROM Employees', con)
df.iloc[0:3,0:4]
###

執行畫面:


# end

2022年7月31日 星期日

Standard Deviation in Python, R


標準差之計算在 Python, R 結果都相同嗎?

感謝 Pei-Chun 提供 Python 問題.

標準差

統計學的標準差(Standard Deviation, SD)可以區分為母體標準差與樣本標準差, 符號之說明如下:

σ: 母體標準差, N: 母體個數, μ:  母體平均值

s: 樣本標準差, n: 樣本個數, x_bar: 樣本平均值

母體標準差與樣本標準差之計算公式:


公式法

考慮資料集為 {1,2,3,4,5}, μ = (1+2+3+4+5)/5=3, 使用公式法計算結果:

母體標準差 σ =(((1-3)^2+...+(5-3)^2)/5)^0.5=1.414214 (分母為5)

樣本標準差 σ =(((1-3)^2+...+(5-3)^2)/4)^0.5=1.581139 (分母為4)

Python-numpy 模組-不含NA值

使用 numpy.std 函數可以計算標準差, 分母預設值為樣本數 n, 其中參數 ddof(Means Delta Degrees of Freedom) 的預設值為 ddof=0, 如果設定 ddof=1, 則分母為 n-1, 詳細參考線上說明 [LINK].


Python-pandas 模組-不含NA值

使用 pandas.describe 函數以計算標準差, 其預設值為 n-1. 

使用 df.describe().iloc[2,0] 取出 std 值, 另外也可以使用 df.describe().loc['std'] 取出 std值.


Python-numpy 模組-有NA值

上述討論都沒有NA值的情形, 如果資料包括NA值時, 其計算結果為 nan, 使用 numpy.nanstd 函數可以忽略 NA值並計算標準差.


Python-pandas 模組-有NA值

使用 pandas.describe 函數以計算標準差, 其預設值為 n-1, 且會忽略NA值並計算標準差, 此特性須特別注意.


R-不含NA值

使用 sd {stats} 函數可計算標準差. stats 為R內建30個標準套件之一, 啟動R時, 已經載入該套件. 計算結果分母採用 n-1.


R-有NA值

如果資料有NA值, 則 sd 計算結果為 NA. 

使用 na.rm = TRUE 參數可忽略NA值並計算標準差.


結論

使用 Python 與 R 語言須確認計算標準差之意義, 如果資料有NA值, 須特別小心處理.

# end

2022年7月2日 星期六

Python Orange-Associate Tutorial

主題: Python Orange - 關聯規則教學


本篇說明 Python 的 Orange 模組中,  外掛 Associate 的使用, 包括建立頻繁項目集與關聯規則.

感謝 Chen-Yao 提供此問題.


Youtube: 


Orange 3 特性:
University of Ljubljana, Slovenia, 10 October 1996
視覺化程式設計工具(Visual Programming Tools)
執行更加快速(C++)與視覺化操作
提供多種機器學習模組
開放原始碼與跨平台
適用於Python模組
資料預處理
模型訓練
部署

大綱:
1. Orange 3 簡介
2. Orange 3 安裝 
3. 安裝 Add-ons Associate
4. 案例示範 (技巧: Pivot Table 樞紐分析)
5. Q & A


Github資料:

資料集:
northwind_trans.csv